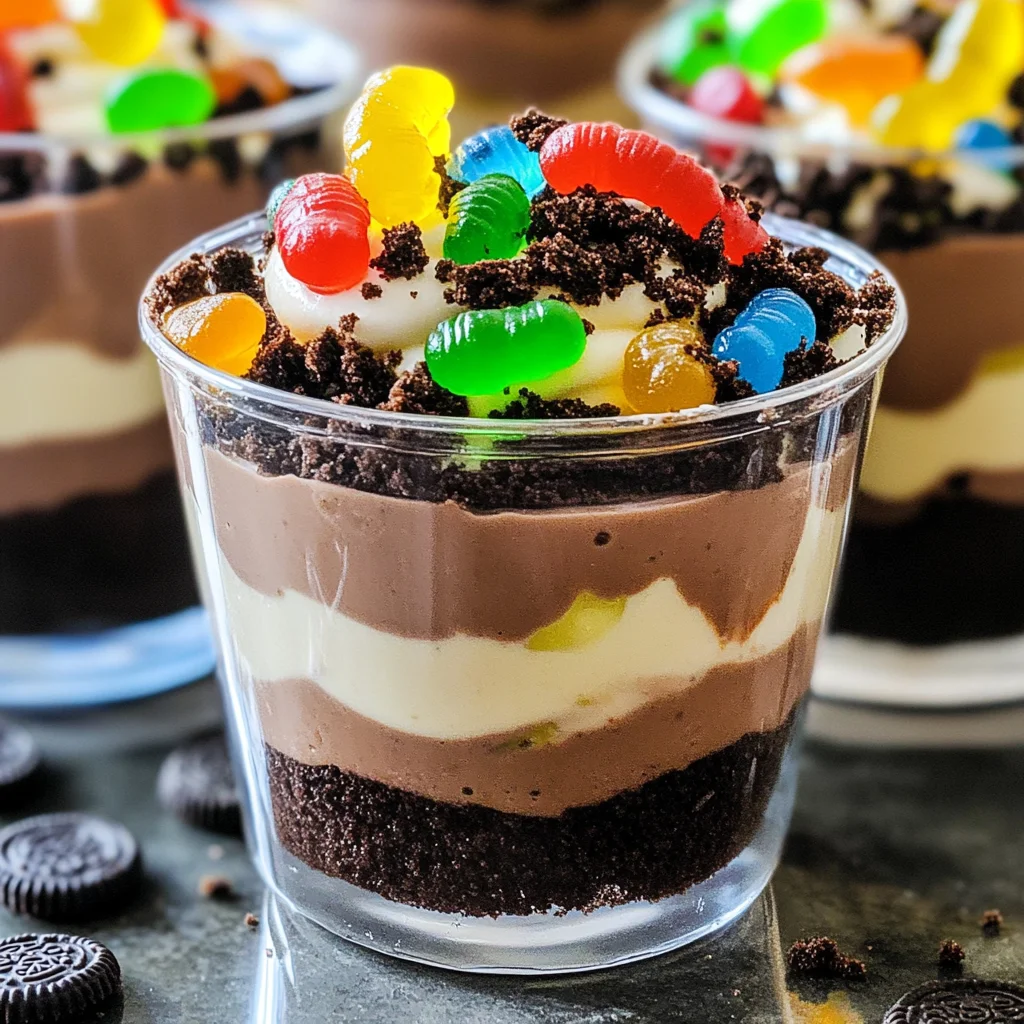
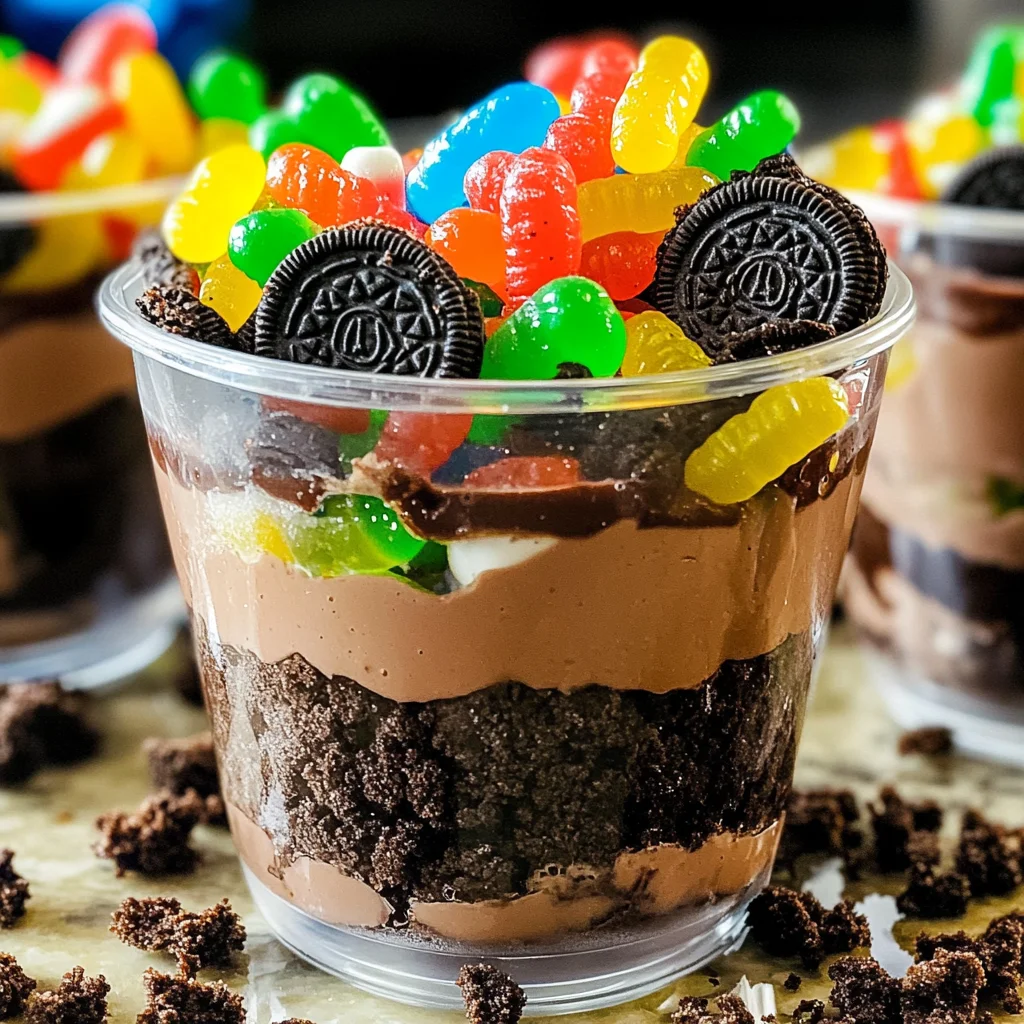
Dirt Cups
Dirt Cups are a delightful dessert that combines layers of chocolate pudding, crushed Oreos, and gummy worms. This fun and easy-to-make treat is perfect for kids’ parties, Halloween celebrations, or any occasion where you want to add a playful twist to your dessert table. With their delightful presentation and irresistible taste, Dirt Cups are sure to be a hit with both children and adults alike.
Why You’ll Love This Recipe
- Quick and Easy: This recipe takes just 10 minutes of prep time, making it perfect for last-minute gatherings.
- Kid-Friendly Fun: The playful appearance with gummy worms makes this dessert irresistible to kids.
- Customizable Layers: You can easily switch up the flavors or toppings to suit your taste preferences.
- Great for Any Occasion: Whether it’s a birthday, Halloween, or just a family night in, Dirt Cups fit right in.
- No Baking Required: Enjoy the deliciousness without the hassle of turning on the oven.
Tools and Preparation
To prepare Dirt Cups effectively, you’ll need some essential tools. Having the right equipment will make your cooking experience smoother.
Essential Tools and Equipment
- Mixing bowl
- Whisk
- Measuring cups
- Serving cups or glasses
- Spoon
Importance of Each Tool
- Mixing bowl: A good mixing bowl allows for easy combining of ingredients without spills.
- Whisk: Use a whisk for smooth pudding; it helps avoid lumps during mixing.
- Serving cups or glasses: These enhance presentation and make serving easy for parties.
Ingredients
Layers of chocolate pudding, crushed Oreos topped with gummy worms!
For the Pudding Layer
- 3.4 ounces box instant chocolate pudding mix
- 2 cups milk
- 8 ounces whipped topping (thawed)
For the Topping Layer
- 10-12 Oreo cookies (crushed)
- 32 gummy worms
How to Make Dirt Cups
Step 1: Prepare the Pudding
- In a medium bowl, add cold milk.
- Sprinkle the pudding mix over the milk.
- Whisk until well combined.
Step 2: Thicken the Mixture
- Let the mixture sit for 5 minutes to thicken.
Step 3: Fold in Whipped Topping
- Gently fold in the whipped topping until everything is well combined.
Step 4: Assemble the Cups
- Spoon the pudding mixture into cups or glasses.
- Sprinkle crushed Oreo cookies on top of each cup.
Step 5: Add Gummy Worms
- Place 4 gummy worms on top of each cup for decoration.
Step 6: Chill
- Refrigerate until you’re ready to serve.
With these steps followed carefully, you’ll have delicious Dirt Cups ready to impress your guests! Enjoy this fun dessert that brings joy to any gathering!
How to Serve Dirt Cups
Dirt Cups are a fun and creative dessert that can be served in a variety of ways. Whether you’re hosting a party, celebrating a birthday, or just want a special treat, these serving suggestions will make your Dirt Cups even more delightful.
Individual Cups
- Serve each Dirt Cup in clear plastic cups for a fun and festive look. This allows guests to see the delicious layers of pudding and crushed Oreos.
Party Platter
- Arrange several Dirt Cups on a large platter for an eye-catching display. Add some gummy worms crawling out from the cups for added effect.
Themed Decorations
- Match your serving style to the occasion. For Halloween, use spooky decorations like fake spider webs or small plastic spiders around the cups.
Kid-Friendly Presentation
- Use colorful straws or fun spoons for kids to enjoy their Dirt Cups. This adds an extra element of excitement and makes it easier for little hands to dig in.
How to Perfect Dirt Cups
Perfecting your Dirt Cups is easy with just a few helpful tips. These tricks ensure your dessert is both delicious and visually appealing.
-
Use cold milk: Starting with cold milk helps the pudding mixture thicken properly, creating a creamy texture.
-
Crush Oreos finely: For a better presentation, crush Oreos into smaller pieces. This creates a more realistic dirt appearance on top of your pudding layer.
-
Chill before serving: Letting your Dirt Cups chill in the refrigerator for at least 30 minutes allows flavors to meld and improves the overall taste.
-
Add extra toppings: Consider adding additional toppings like chocolate sprinkles or mini chocolate chips for extra texture and flavor.
Best Side Dishes for Dirt Cups
Pairing your Dirt Cups with complementary side dishes can enhance your dessert experience. Here are some great options:
-
Fruit Salad: A refreshing mix of seasonal fruits balances the sweetness of Dirt Cups and adds nutritional value.
-
Mini Sandwiches: Small sandwiches can be an easy-to-eat addition that satisfies savory cravings alongside sweet treats.
-
Veggie Platter: Crisp vegetables with dip provide a healthy contrast to the richness of Dirt Cups.
-
Cheese Cubes: A selection of cheeses offers variety and can be enjoyed between bites of dessert.
-
Chocolate-Covered Pretzels: The salty-sweet combination complements the flavors in Dirt Cups beautifully.
-
Ice Cream Cones: Serve mini cones filled with ice cream as an alternative sweet treat that pairs nicely with pudding desserts.
-
Popcorn Bar: Offer different flavored popcorns as a crunchy snack option that contrasts well with the creamy dessert.
-
Beverage Station: Set up drinks like lemonade or iced tea to refresh guests while they enjoy their sweet treats.
Common Mistakes to Avoid
When making Dirt Cups, it’s easy to overlook a few key steps. Here are some common mistakes and how to avoid them.
- Skipping the Pudding Thicken Time: Allowing the pudding to sit for 5 minutes is crucial. Skipping this step can lead to a runny dessert.
- Not Crushing Oreos Enough: Ensure the Oreos are finely crushed. Large chunks won’t blend well with the pudding and will affect the texture.
- Overmixing Whipped Topping: Gently fold in the whipped topping. Overmixing can deflate it, leading to a less fluffy dessert.
- Using Warm Milk: Always use cold milk when preparing the pudding mix. Warm milk can prevent proper thickening.
- Neglecting Chill Time: Allow the Dirt Cups to chill before serving. This enhances the flavors and improves overall texture.
Storage & Reheating Instructions
Refrigerator Storage
- Store Dirt Cups in an airtight container for up to 3 days.
- Keep them chilled until ready to serve.
Freezing Dirt Cups
- It is best not to freeze Dirt Cups as it can change the texture of the whipped topping and gummy worms.
- If necessary, place in a freezer-safe container for up to 1 month.
Reheating Dirt Cups
- Oven: Not recommended for this recipe as it may alter textures.
- Microwave: Not suitable; thawing may affect consistency.
- Stovetop: Avoid reheating; serve chilled for best results.
Frequently Asked Questions
Here are some common questions about making Dirt Cups that you might find helpful.
Can I make Dirt Cups ahead of time?
Yes, you can prepare Dirt Cups a day in advance. Just keep them covered in the refrigerator until ready to serve.
What variations can I try with Dirt Cups?
You can customize your Dirt Cups by adding different candies, such as gummy bears or chocolate sprinkles, instead of gummy worms.
Are Dirt Cups suitable for kids?
Definitely! Their fun appearance and delicious taste make them a popular treat among kids and adults alike.
How long do Dirt Cups last?
Dirt Cups can be stored in the refrigerator for up to 3 days, but they are best enjoyed fresh.
Final Thoughts
Dirt Cups are a delightful dessert that combines layers of chocolate pudding with crunchy Oreos and fun gummy worms. They’re perfect for any occasion and easy to customize based on your preferences. Try adding different candies or toppings for an exciting twist!
Dirt Cups

Dirt Cups are a whimsical dessert that brings joy to any gathering, combining creamy chocolate pudding, crushed Oreos, and playful gummy worms. This fun, no-bake treat is perfect for kids’ parties, Halloween celebrations, or family movie nights. With just a few simple ingredients and minimal prep time, you can create an eye-catching dessert that will impress both children and adults alike. The layers of chocolatey goodness topped with crunchy cookie crumbs and colorful gummy worms make Dirt Cups not only delicious but also visually appealing. Enjoy this delightful treat that adds a playful twist to your dessert table!
- Prep Time: 10 minutes
- Cook Time: None
- Total Time: 0 hours
- Yield: Makes approximately 4 servings 1x
- Category: Dessert
- Method: No-Bake
- Cuisine: American
Ingredients
- 3.4 ounces instant chocolate pudding mix
- 2 cups cold milk
- 8 ounces whipped topping (thawed)
- 10–12 Oreo cookies (crushed)
- 32 gummy worms
Instructions
- In a mixing bowl, combine cold milk and pudding mix; whisk until smooth.
- Let the mixture sit for 5 minutes to thicken.
- Gently fold in the whipped topping until fully combined.
- Spoon the pudding mixture into serving cups.
- Top each cup with crushed Oreos.
- Decorate with 4 gummy worms on each cup.
- Chill in the refrigerator until ready to serve.
Nutrition
- Serving Size: 1 cup (200g)
- Calories: 300
- Sugar: 20g
- Sodium: 150mg
- Fat: 15g
- Saturated Fat: 7g
- Unsaturated Fat: 5g
- Trans Fat: 0g
- Carbohydrates: 40g
- Fiber: 2g
- Protein: 4g
- Cholesterol: 15mg