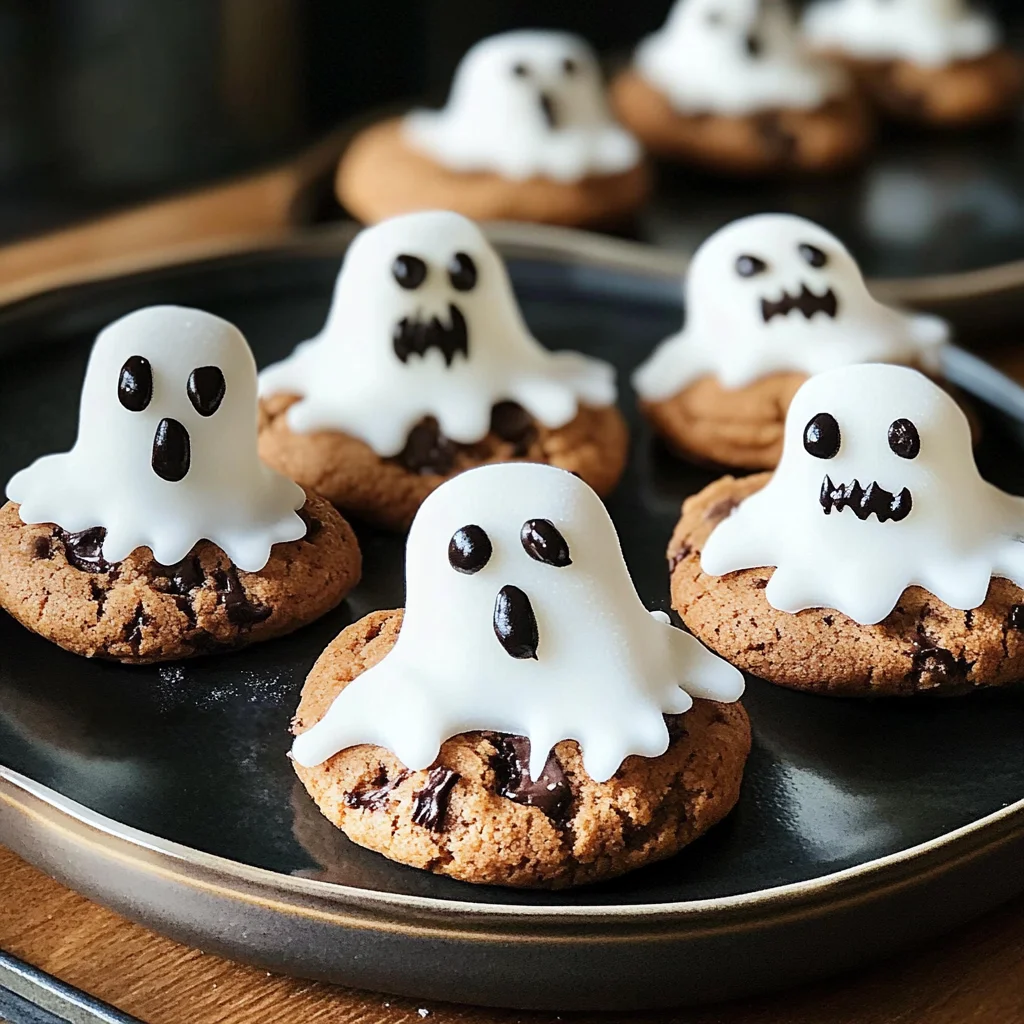
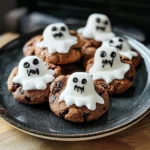
Ghost cookies
Ghost cookies are the perfect spooky treats for Halloween! These delightful snacks are not only fun to make but also appeal to kids and adults alike. With a touch of creativity, you can turn ordinary cookies into adorable ghost shapes that will impress at any Halloween gathering. Easy to prepare and visually striking, these ghost cookies are sure to be a highlight of your festive celebrations.
Why You’ll Love This Recipe
- Quick and Easy: This ghost cookies recipe takes just 25 minutes from start to finish, making it perfect for last-minute party preparations.
- Fun for All Ages: Decorating these cookies is an enjoyable activity for kids and adults, allowing everyone to unleash their inner artist.
- Versatile Treats: You can customize the designs with different colors and patterns, making them suitable for various occasions beyond Halloween.
- Minimal Ingredients: With just a few simple ingredients, these ghost cookies are easy to whip up without needing extensive baking skills.
- Deliciously Sweet: The combination of chocolate chunk cookies and sweet icing ensures each bite is a delightful treat.
Tools and Preparation
To make these ghost cookies, you’ll need some essential tools. Having the right equipment makes the process smoother and more enjoyable.
Essential Tools and Equipment
- Baking tray
- Parchment paper
- Mixing bowl
- Spatula
Importance of Each Tool
- Baking Tray: A good quality baking tray ensures even cooking and prevents sticking, making cookie removal hassle-free.
- Parchment Paper: Using parchment paper makes cleanup easy and helps prevent the cookies from sticking to the tray.
- Mixing Bowl: A sturdy mixing bowl is essential for combining icing sugar and other ingredients without spilling.
- Spatula: A flexible spatula is useful for spreading icing smoothly over the cookies.
Ingredients
To create these spooky ghost cookies, gather the following ingredients:
For the Ghost Cookies
- 175g icing sugar
- 1 x 200g pack chocolate chunk cookies
- 9 vegan marshmallows (regular size)
- black writing icing
How to Make Ghost Cookies
Step 1: Prepare Your Workspace
Start by laying out all your ingredients on a clean surface. Preheat your oven if needed, although this recipe primarily focuses on decorating pre-made cookies.
Step 2: Make the Icing
In a mixing bowl, combine the icing sugar with a small amount of water until you reach a smooth consistency that’s easy to spread.
Step 3: Decorate the Cookies
Place each chocolate chunk cookie on your baking tray lined with parchment paper.
1. Use a spatula to spread the icing over each cookie evenly.
2. Cut each vegan marshmallow in half horizontally.
3. Place half of a marshmallow on top of each iced cookie as the ghost’s head.
Step 4: Add Features with Icing
Using black writing icing, carefully draw eyes and mouths on each marshmallow to give your ghosts personality! Feel free to get creative with different expressions.
Step 5: Let Them Set
Allow the decorated ghost cookies to sit until the icing sets slightly before serving or packaging them for later.
Enjoy your deliciously spooky ghost cookies at your next Halloween party or event!
How to Serve Ghost cookies
Ghost cookies are a fun and festive way to celebrate Halloween. These delightful treats can be served in various ways to enhance your spooky gatherings.
Individual Treat Bags
- Use small, clear bags to package individual cookies. Add festive ribbons for a charming touch.
Dessert Platter
- Arrange the ghost cookies on a large platter. Surround them with Halloween-themed decorations like mini pumpkins or spiders for an eye-catching display.
Trick-or-Treat Stations
- Set up a station at your Halloween party with ghost cookies alongside other treats. This interactive setup encourages guests to grab their favorites.
Halloween Themed Ice Cream Sundae
- Crumble ghost cookies over vanilla ice cream for a fun topping. Add chocolate sauce and sprinkles for extra Halloween flair.
How to Perfect Ghost cookies
To ensure your ghost cookies turn out perfectly, follow these simple tips.
-
Use fresh ingredients: Always check the expiration dates on your ingredients, especially the icing sugar and marshmallows.
-
Chill the cookies: Allow the chocolate chunk cookies to cool completely before decorating. This prevents the icing from melting.
-
Pipe carefully: When using black writing icing, take your time and pipe slowly for neat designs. Practice on parchment paper if needed.
-
Store properly: Keep any leftover ghost cookies in an airtight container to maintain freshness and prevent them from becoming stale.
Best Side Dishes for Ghost cookies
Pairing side dishes with ghost cookies can elevate your Halloween celebration. Here are some delicious options:
-
Pumpkin Soup: A creamy and warm pumpkin soup complements the sweetness of ghost cookies, creating a cozy autumn vibe.
-
Spooky Veggie Platter: Create a platter with assorted vegetables cut into Halloween shapes, served with hummus or ranch dip for a healthy snack option.
-
Candy Corn Salad: Toss together mixed greens, candy corn, and nuts for a sweet and crunchy salad that fits the theme perfectly.
-
Apple Slices with Caramel Dip: Fresh apple slices drizzled with caramel provide a crisp contrast to the soft ghost cookies.
-
Cheesy Garlic Breadsticks: Warm, cheesy breadsticks make a savory addition to balance out the sweetness of your dessert table.
-
Halloween Fruit Skewers: Assemble skewers of seasonal fruits like grapes and melon balls shaped like ghosts or pumpkins for a fun treat everyone will enjoy.
Common Mistakes to Avoid
When making ghost cookies, it’s easy to overlook some key steps. Here are common mistakes to steer clear of while preparing this fun treat.
- Ignoring the consistency of icing: If your icing sugar is too thick, it won’t spread well on the cookies. Mix in a little water or lemon juice until you achieve a smooth texture.
- Not using enough marshmallows: Marshmallows are essential for that ghostly appearance. Ensure you use enough to cover each cookie adequately.
- Skipping chilling the cookies: Some bakers forget to chill their cookies after decorating. This step helps the icing set properly and prevents smudging.
- Overbaking cookies: Keep a close eye on your cookies while baking. Overbaking can dry them out, making it harder to enjoy their chewy texture.
- Using the wrong writing icing: Make sure to choose a suitable black writing icing for decorating. Regular icing may run or not adhere properly to the cookies.
Storage & Reheating Instructions
Refrigerator Storage
- Store ghost cookies in an airtight container for up to 5 days.
- Place parchment paper between layers of cookies to prevent sticking.
Freezing Ghost cookies
- Freeze ghost cookies for up to 3 months.
- Use freezer-safe containers or bags, removing as much air as possible before sealing.
Reheating Ghost cookies
- Oven: Preheat your oven to 350°F (175°C). Place the cookies on a baking sheet for about 5 minutes to warm them up.
- Microwave: Heat individual cookies for about 10-15 seconds. Be careful not to overheat, as this can make them tough.
- Stovetop: Warm in a pan over low heat for about a minute, flipping halfway through for even warmth.
Frequently Asked Questions
Here are some common questions about ghost cookies that might help you with your baking adventure!
What are ghost cookies?
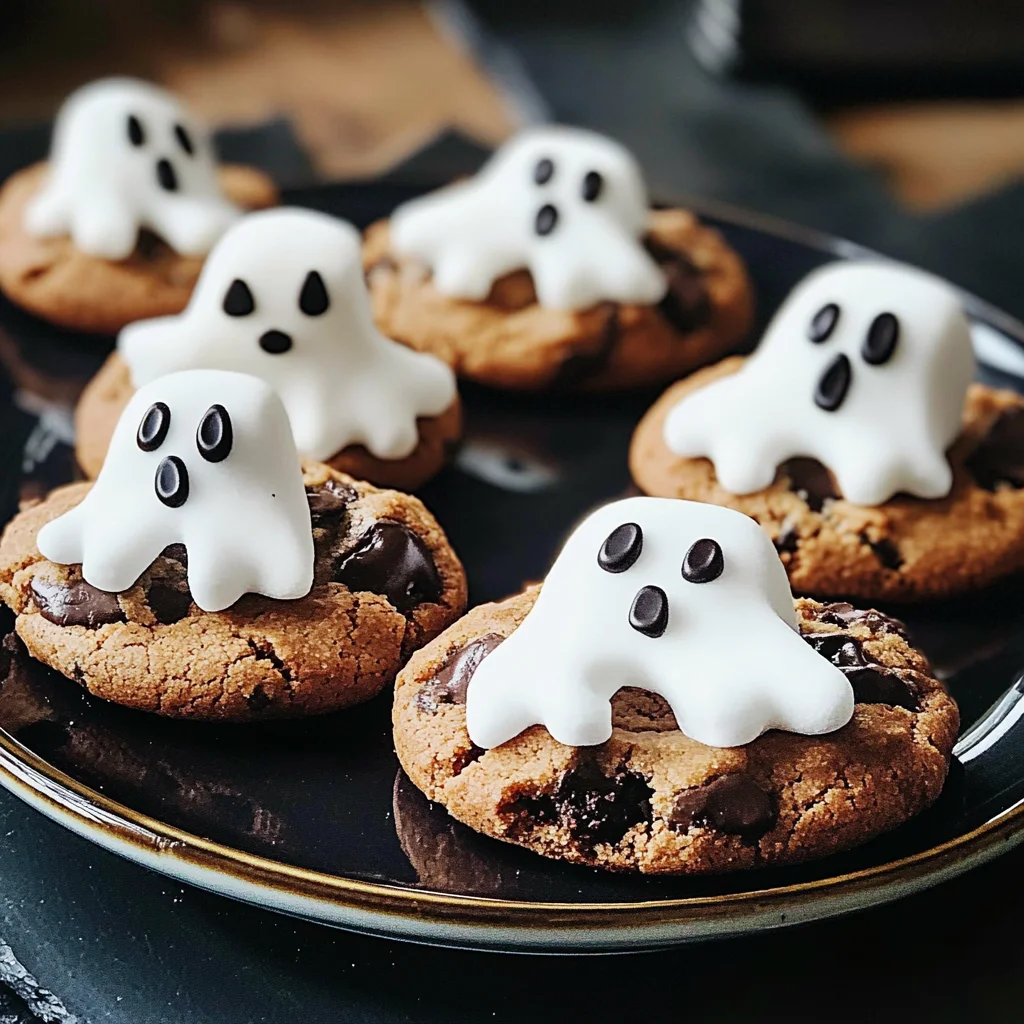
Ghost cookies are Halloween-themed treats made by decorating chocolate chunk cookies with icing and marshmallows to resemble spooky ghosts.
Can I customize my ghost cookies?
Absolutely! You can use different colors of icing, add edible glitter, or even use different cookie bases like peanut butter or oatmeal.
How long do ghost cookies last?
Properly stored ghost cookies can last up to 5 days in the refrigerator and up to 3 months in the freezer.
Are ghost cookies easy to make?
Yes! This recipe is straightforward and perfect for both beginner and experienced bakers looking for fun Halloween treats.
Final Thoughts
Ghost cookies are a delightful addition to any Halloween celebration. Their simplicity allows for customization based on personal tastes or themes. Whether you’re hosting a party or just want a spooky treat at home, these ghostly delights are sure to impress!
Ghost Cookies
Ghost cookies are the ultimate festive treat for Halloween, effortlessly combining creativity with deliciousness. These spooky delights are made by decorating chocolate chunk cookies to resemble playful ghosts, making them a hit at any gathering. With minimal ingredients and easy steps, they’re perfect for bakers of all skill levels, providing an enjoyable way to celebrate the holiday with family and friends. Get ready to unleash your inner artist as you transform ordinary cookies into charming ghostly figures that are sure to impress both kids and adults alike!
- Prep Time: 15 minutes
- Cook Time: 10 minutes
- Total Time: 25 minutes
- Yield: Makes approximately 9 ghost cookies 1x
- Category: Dessert
- Method: Baking
- Cuisine: American
Ingredients
- 175g icing sugar
- 200g chocolate chunk cookies
- 9 vegan marshmallows (regular size)
- black writing icing
Instructions
- Prep your workspace by laying out all ingredients on a clean surface.
- In a mixing bowl, combine icing sugar with a small amount of water until smooth.
- Place each chocolate chunk cookie on a parchment-lined baking tray and spread icing over the top.
- Cut each vegan marshmallow in half horizontally and place one half on each iced cookie for the ghost's head.
- Use black writing icing to draw eyes and mouths on the marshmallow halves.
- Allow decorated cookies to set before serving or packaging.
Nutrition
- Serving Size: 1 cookie (35g)
- Calories: 150
- Sugar: 20g
- Sodium: 40mg
- Fat: 5g
- Saturated Fat: 2g
- Unsaturated Fat: 3g
- Trans Fat: 0g
- Carbohydrates: 26g
- Fiber: 0g
- Protein: 1g
- Cholesterol: 0mg