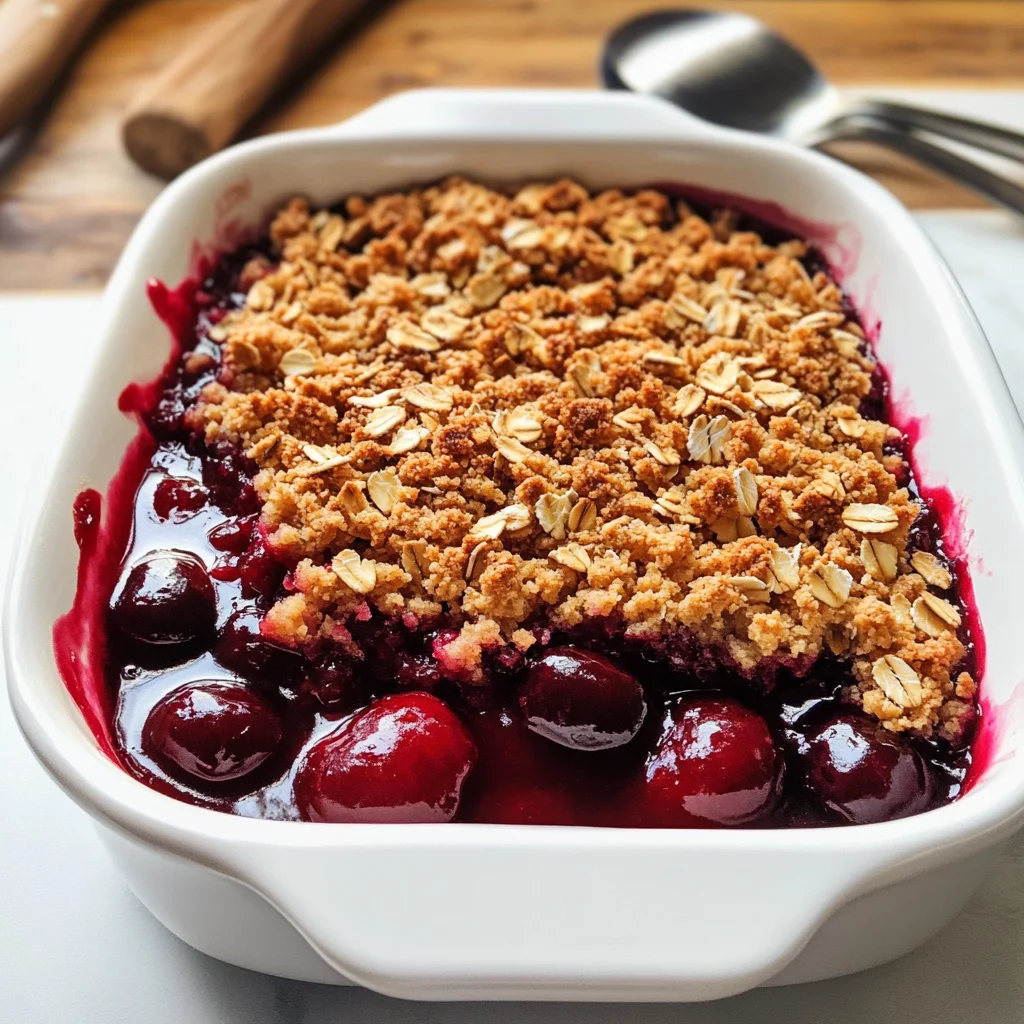
Cherry Crisp
This Cherry Crisp Recipe is the perfect dessert for any occasion! With its delicious, saucy cherries and a buttery oat topping, it’s simple enough for weeknight dinners yet impressive enough for gatherings. Serve it warm with a scoop of vanilla ice cream, and you’ll be rewarded with a comforting treat that’s bursting with flavor. This cherry crisp stands out with its delightful combination of textures and tastes, making it an instant favorite among friends and family.
Why You’ll Love This Recipe
- Quick and Easy: This recipe comes together in just 20 minutes of prep time, making it perfect for busy cooks.
- Delicious Flavor: The sweet cherries paired with the crunchy oat topping create an irresistible dessert.
- Versatile Ingredients: Use canned cherry pie filling or fresh cherries based on what’s available; both options yield fantastic results.
- Crowd-Pleaser: Ideal for parties, potlucks, or family gatherings—everyone loves a good cherry crisp!
- Customizable Topping: Feel free to add nuts or change spices to suit your taste preferences.
Tools and Preparation
To make this Cherry Crisp, you’ll need some essential tools that will help you achieve the best results.
Essential Tools and Equipment
- Baking pan (9×9-inch)
- Mixing bowl
- Pastry cutter
- Parchment paper or silicone baking mat
Importance of Each Tool
- Baking pan (9×9-inch): The right size ensures even cooking for your cherry crisp.
- Mixing bowl: A large bowl allows easy mixing of ingredients without spills.
- Pastry cutter: This tool helps blend butter into the dry mix to create that perfect crumbly topping.
Ingredients
This quick and easy Cherry Crisp Recipe combines saucy sweet cherries with a buttery oat topping. Serve it with vanilla ice cream for the perfect dessert!
Dry Ingredients
- 1 cup flour
- 1 cup old-fashioned oats
- 1 cup light brown sugar (lightly packed)
- 1 teaspoon ground cinnamon
- 1/4 teaspoon ground nutmeg (optional)
- 1/2 teaspoon baking soda
- 1 teaspoon salt
Wet Ingredients
- 12 tablespoons unsalted butter (cold, cubed)
- 2 (21-ounce) cans cherry pie filling (or fresh cherries, see note 1)
How to Make Cherry Crisp
Step 1: Preheat the Oven
Preheat your oven to 350°F. Line a sheet pan with parchment paper or a silicone baking mat and lightly grease your baking pan.
Step 2: Prepare the Topping
In a large mixing bowl:
Combine the flour, oats, brown sugar, cinnamon, nutmeg, baking soda, and salt.
Add in the cold cubed butter. Use a pastry cutter or your fingertips to blend until the mixture resembles coarse crumbs. If it warms up too much, chill it in the refrigerator for about 20 minutes.
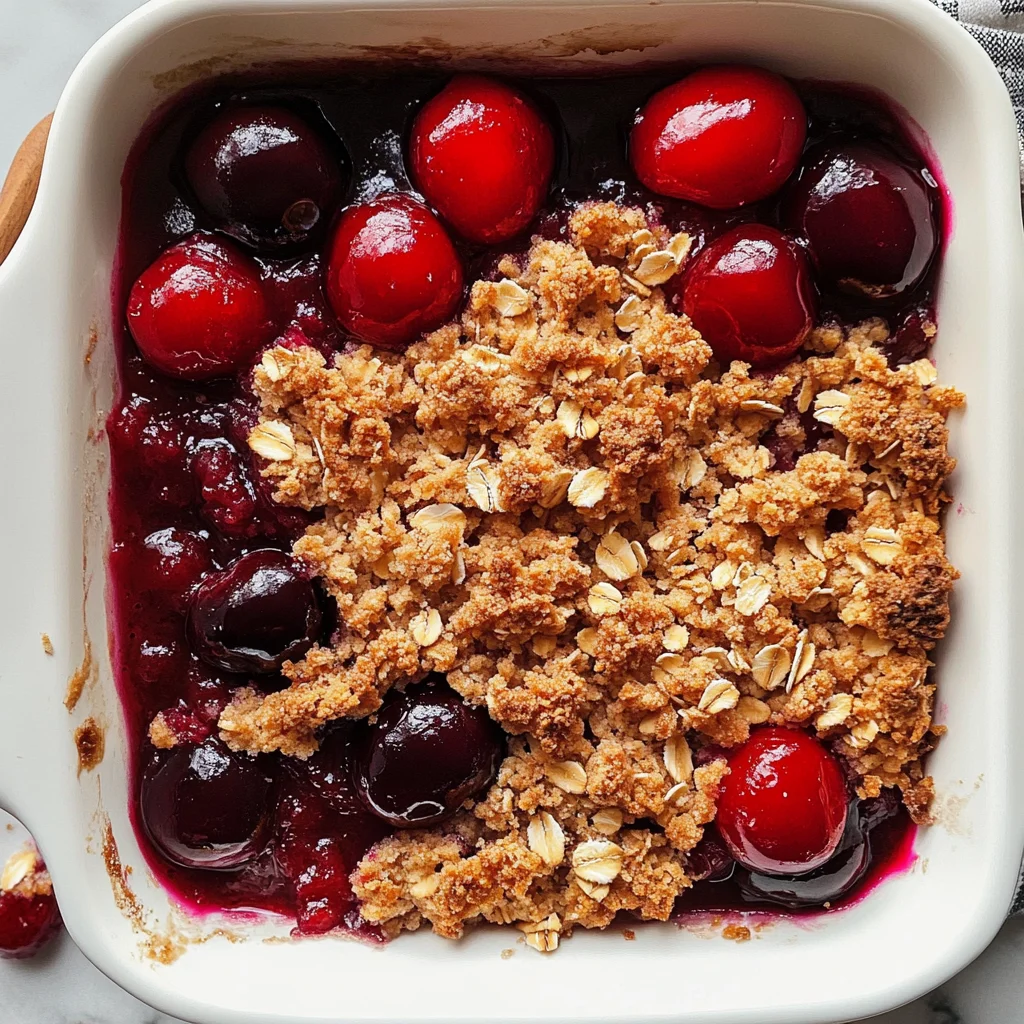
Step 3: Assemble the Crisp
Scoop the cherry pie filling into your greased baking pan and smooth it out evenly.
Sprinkle the crumbly topping over the cherries without pressing it down. Make sure it’s spread evenly across.
Step 4: Bake the Crisp
Place your dish in the center of the lined pan:
Bake for 40–50 minutes until the topping turns golden brown and the cherry filling bubbles at the edges.
If necessary, cover with foil if browning too quickly.
Step 5: Cool and Serve
Allow your Cherry Crisp to cool on a rack for 15–20 minutes before serving. Enjoy it warm with vanilla bean ice cream or fresh whipped cream!
How to Serve Cherry Crisp
Cherry Crisp is a delightful dessert that can be enjoyed in various ways. Whether you prefer it warm or cold, here are some serving suggestions to enhance your experience.
à la Mode
- Serve warm Cherry Crisp with a scoop of vanilla ice cream. The creamy texture complements the fruity filling perfectly.
Whipped Cream Topping
- Add a dollop of fresh whipped cream on top for an extra layer of richness. It balances the sweetness of the cherries beautifully.
Yogurt Parfait
- Layer Cherry Crisp with Greek yogurt for a healthier twist. This combination makes for a delicious breakfast or snack option.
Drizzle with Caramel Sauce
- For those with a sweet tooth, a drizzle of caramel sauce over the top adds an indulgent touch that enhances flavor.
Fresh Berries
- Add fresh berries like raspberries or blueberries on the side. Their tartness pairs well with the sweet cherries and adds color to your plate.
Nuts for Crunch
- Sprinkle chopped nuts such as almonds or walnuts on top. This provides an added crunch and nutty flavor that contrasts nicely with the soft cherries.
How to Perfect Cherry Crisp
To achieve the best Cherry Crisp, consider these helpful tips:
-
Use Fresh Ingredients: Always opt for fresh cherries when in season. They provide superior flavor compared to canned options.
-
Chill Your Butter: Cold butter helps create a flakier topping. If your mixture gets warm, chill it briefly before baking.
-
Don’t Overmix: Mix the topping until just combined. Overmixing can lead to a tough texture instead of a crumbly one.
-
Check for Doneness: The topping should be golden brown and filling bubbly. Keep an eye on it towards the end of baking.
-
Let It Cool: Allow the Cherry Crisp to cool slightly before serving. This lets the filling set and makes it easier to serve.
Best Side Dishes for Cherry Crisp
Cherry Crisp pairs wonderfully with various side dishes, enhancing your dessert experience. Here are some great options:
- Vanilla Ice Cream: A classic pairing that melts into warm crisp, creating a perfect blend of flavors.
- Fresh Fruit Salad: A light and refreshing side that complements the sweetness of cherry crisp with its natural acidity.
- Cheese Platter: A selection of cheeses can add a savory contrast to the sweetness, enhancing overall taste balance.
- Coffee or Espresso: A cup of coffee offers a nice bitter contrast, making each bite more enjoyable.
- Chocolate Sauce: Drizzling chocolate sauce over the crisp can elevate its richness and satisfy chocolate lovers.
- Savory Muffins: Pairing with cornbread or savory muffins adds texture and balances sweetness with savory notes.
- Herbal Tea: A soothing herbal tea can cleanse your palate and complement dessert flavors without overwhelming them.
- Pecan Pie Bars: These bars provide nutty flavors that pair well with cherry crisp, creating an indulgent dessert experience together.
Common Mistakes to Avoid
When making Cherry Crisp, it’s easy to overlook a few key details that can affect your dessert. Here are some common mistakes to watch out for.
- Using warm butter: Using melted or warm butter can change the texture of your topping. Always use cold, cubed butter for the best results.
- Overmixing the topping: Mixing too much can make the topping tough. Blend until just combined, leaving some chunks for a better texture.
- Not chilling the mixture: If your topping mixture gets warm, chill it for 20 minutes before baking to keep it crumbly and light.
- Ignoring baking time: Baking time can vary based on your oven. Keep an eye on it and bake until the topping is golden brown and filling bubbles.
- Serving immediately: Serving Cherry Crisp too soon can lead to runny filling. Let it cool for 15–20 minutes to set properly.
Storage & Reheating Instructions
Refrigerator Storage
- Store in an airtight container in the fridge for up to 3 days.
- Keep it covered to prevent drying out.
Freezing Cherry Crisp
- Freeze in a tightly sealed container or freezer bag for up to 3 months.
- For best results, consider freezing before baking.
Reheating Cherry Crisp
- Oven: Preheat to 350°F and heat for about 15-20 minutes until warmed through.
- Microwave: Heat individual servings on medium power for about 1-2 minutes or until hot.
- Stovetop: Gently reheat in a skillet over low heat, stirring occasionally until warmed.
Frequently Asked Questions
Here are some frequently asked questions about making Cherry Crisp.
Can I use fresh cherries instead of canned?
Yes! You can use fresh cherries. Just pit them and adjust the sugar according to taste.
What other fruits can I use in a cherry crisp recipe?
You can mix cherries with other fruits like blueberries, peaches, or apples for a delightful twist.
How do I make my cherry crisp more crispy?
For a crisper topping, add an extra half cup of oats or almond flour for texture.
Is Cherry Crisp gluten-free?
To make it gluten-free, substitute regular flour with gluten-free flour and ensure all other ingredients are certified gluten-free.
Final Thoughts
Cherry Crisp is not only easy to make but also incredibly versatile. You can customize it with different fruits or toppings based on your preferences. Try this delightful dessert today; it’s sure to bring warmth and joy!
Cherry Crisp
Cherry Crisp is the ultimate comfort dessert that combines sweet, juicy cherries with a crunchy oat topping. This easy-to-make treat is perfect for any occasion, from weeknight dinners to festive gatherings. Warm and fragrant, each bite delivers a delightful blend of textures and flavors, especially when served alongside a scoop of creamy vanilla ice cream. With its quick prep time and versatile ingredient options, Cherry Crisp quickly becomes a family favorite and a go-to recipe for dessert enthusiasts.
- Prep Time: 20 minutes
- Cook Time: 45 minutes
- Total Time: 1 hour 5 minutes
- Yield: Serves approximately 8
- Category: Dessert
- Method: Baking
- Cuisine: American
Ingredients
- 1 cup all-purpose flour
- 1 cup old-fashioned oats
- 1 cup light brown sugar (packed)
- 12 tablespoons cold unsalted butter (cubed)
- 2 (21-ounce) cans cherry pie filling (or fresh cherries)
- 1 teaspoon ground cinnamon
- 1/4 teaspoon ground nutmeg (optional)
- 1/2 teaspoon baking soda
- 1 teaspoon salt
Instructions
- Preheat your oven to 350°F and prepare a greased 9×9-inch baking pan.
- In a mixing bowl, combine flour, oats, brown sugar, cinnamon, nutmeg (if using), baking soda, and salt. Add cold butter and mix until crumbly.
- Spread cherry pie filling evenly in the prepared pan and sprinkle the oat mixture over the top.
- Bake for 40–50 minutes or until the topping is golden brown and the filling bubbles.
- Allow to cool for 15–20 minutes before serving warm.
Nutrition
- Serving Size: 1/8 of the crisp (approximately 90g)
- Calories: 330
- Sugar: 22g
- Sodium: 180mg
- Fat: 16g
- Saturated Fat: 10g
- Unsaturated Fat: 6g
- Trans Fat: 0g
- Carbohydrates: 43g
- Fiber: 2g
- Protein: 3g
- Cholesterol: 30mg